
How to Set Up OBS Replay Buffer for Gaming Clips
Published
OBS Replay Buffer lets you save recent gameplay after a moment happens instead of keeping an entire session just to find one highlight. Enable the buffer, start it before playing, and use a save shortcut when a moment is worth keeping. OBS treats starting the buffer and saving a replay as separate actions.1
This guide focuses on a reliable first setup on Windows. The suggested test values are starting points, not requirements for every computer. Menu labels may differ with your OBS version and interface language.
Start with a scene worth saving
Before adjusting the buffer, check the actual OBS output. Your game should be visible, the microphone should respond when you speak, and the game audio should reach the mixer. A replay of the wrong scene is still the wrong scene.
Use a scene with the framing you intend to keep. Hide private notifications and account details. If you plan to make vertical clips later, leave room around the action rather than placing a large overlay over important gameplay. For a Windows game, OBS documents Game Capture as a suitable capture source; use the supported alternative for games it cannot capture.2
Enable and start Replay Buffer
- Open Settings → Output and locate the Replay Buffer options. The layout differs between output modes.
- Enable Replay Buffer and set Maximum Replay Time. Try 60 seconds for your first test so you have room for the lead-in and reaction; this is an editorial example, not an optimal universal length.
- Check the recording destination and choose a folder you can find again. Verify that the drive has free space and that you can write to it.
- Apply the settings. Under Settings → Hotkeys, assign a shortcut to saving the replay.
- Return to the main window and start Replay Buffer from the controls before the moment you want to capture.13
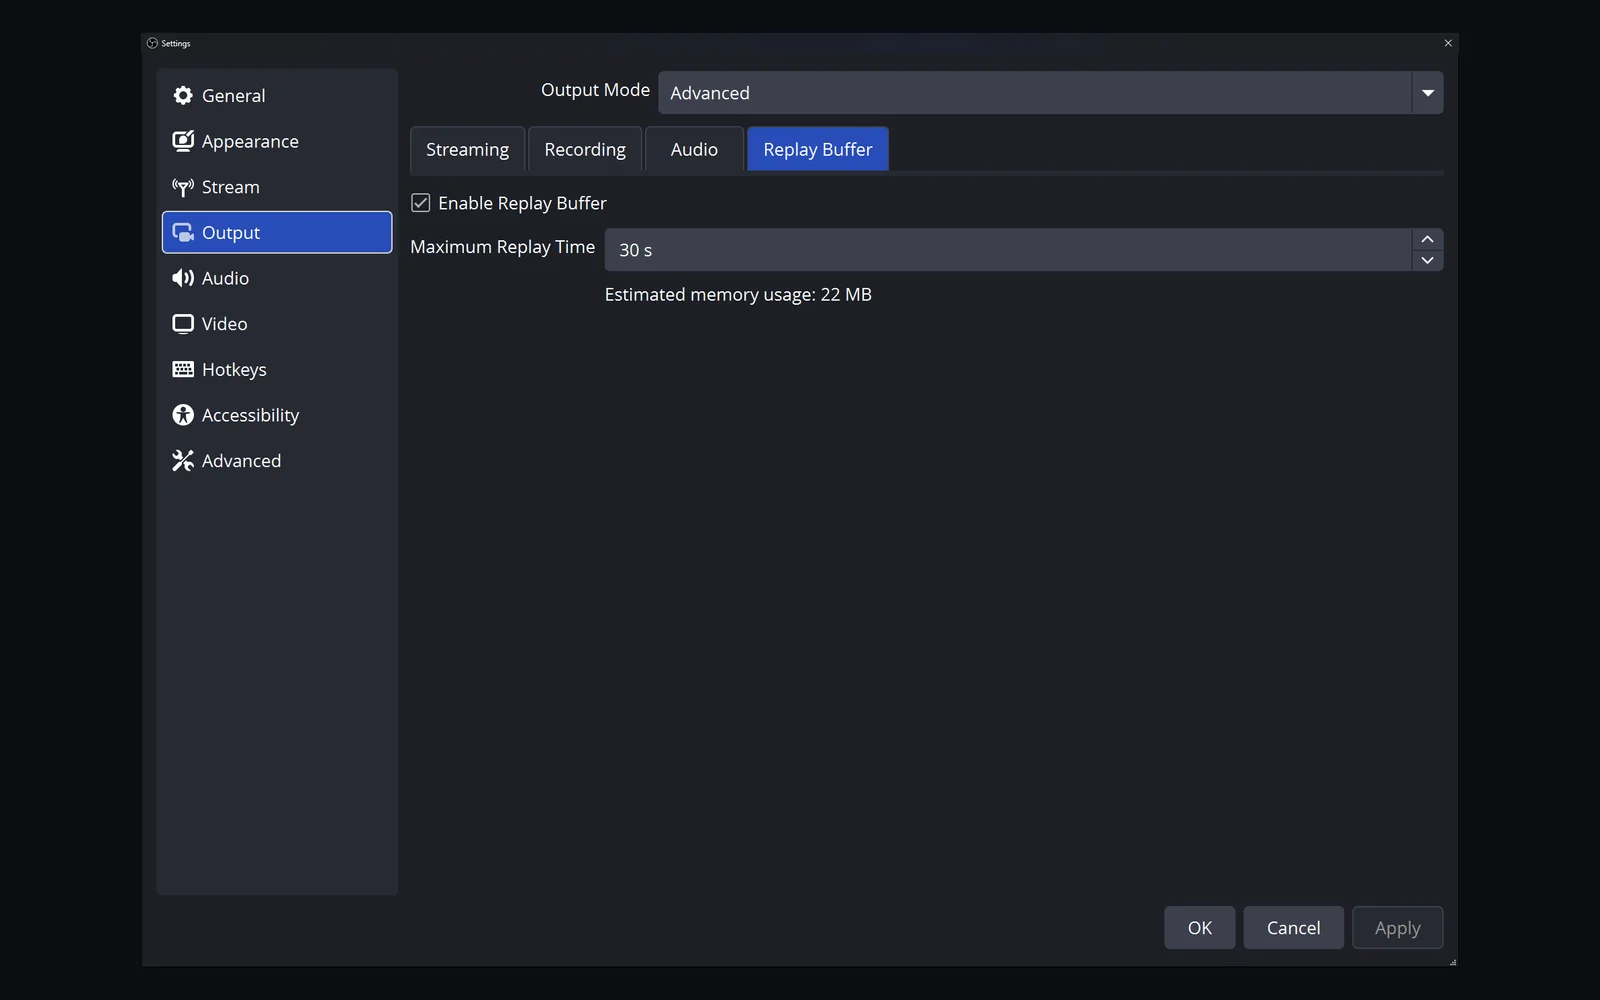
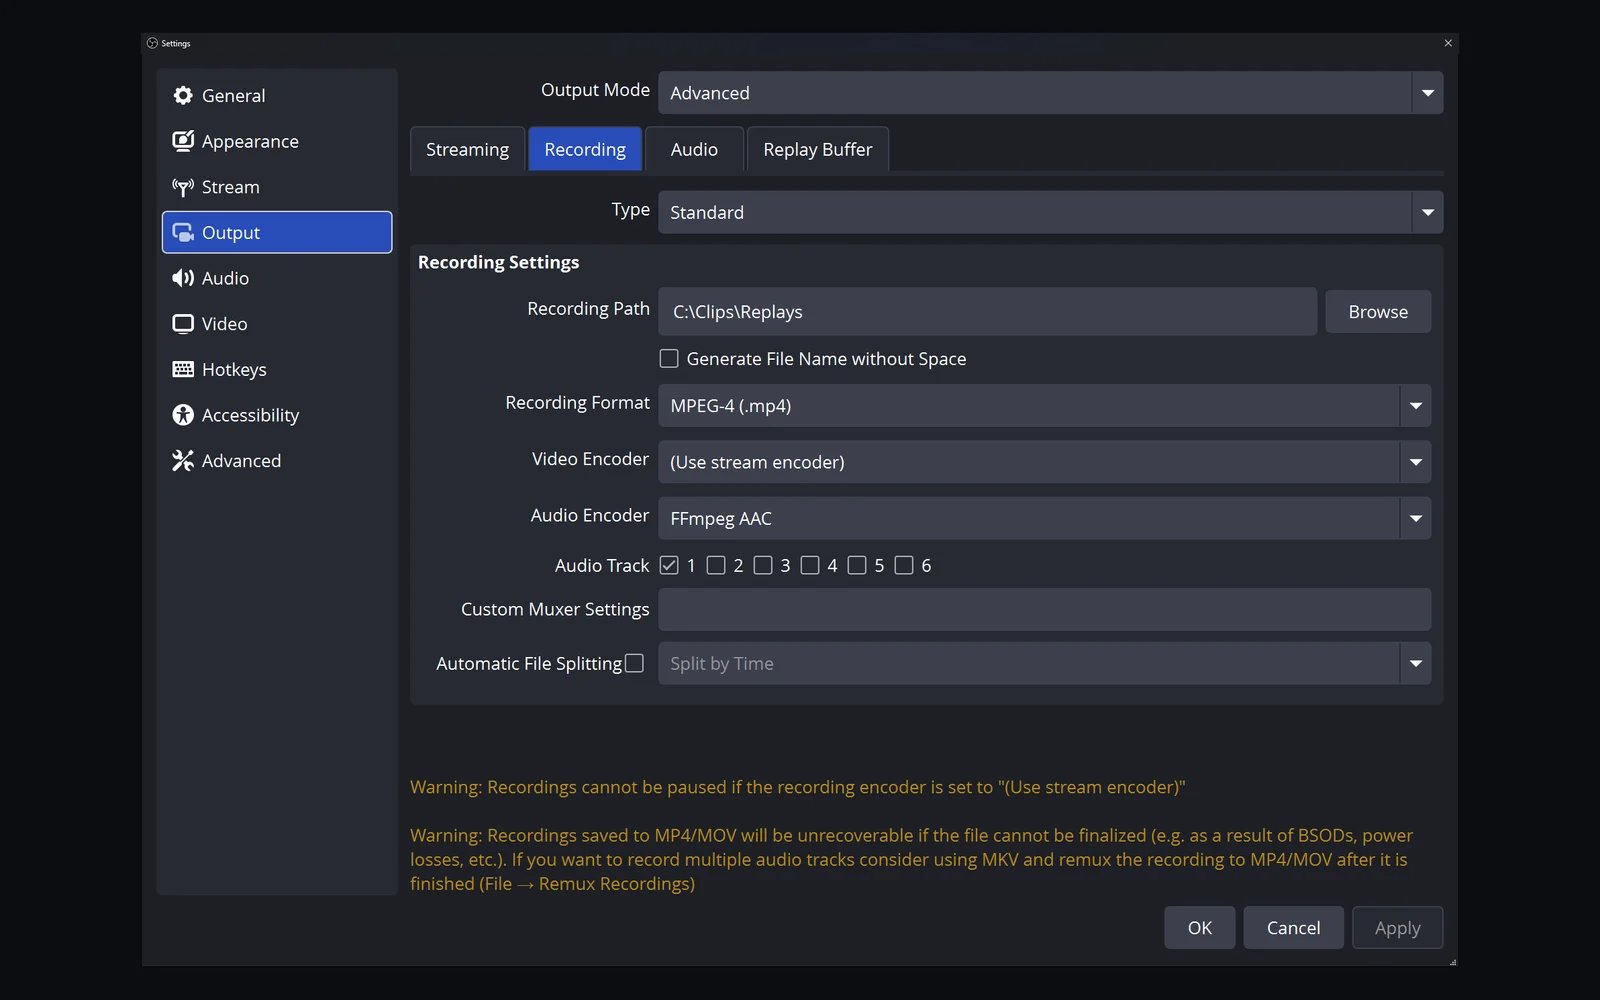
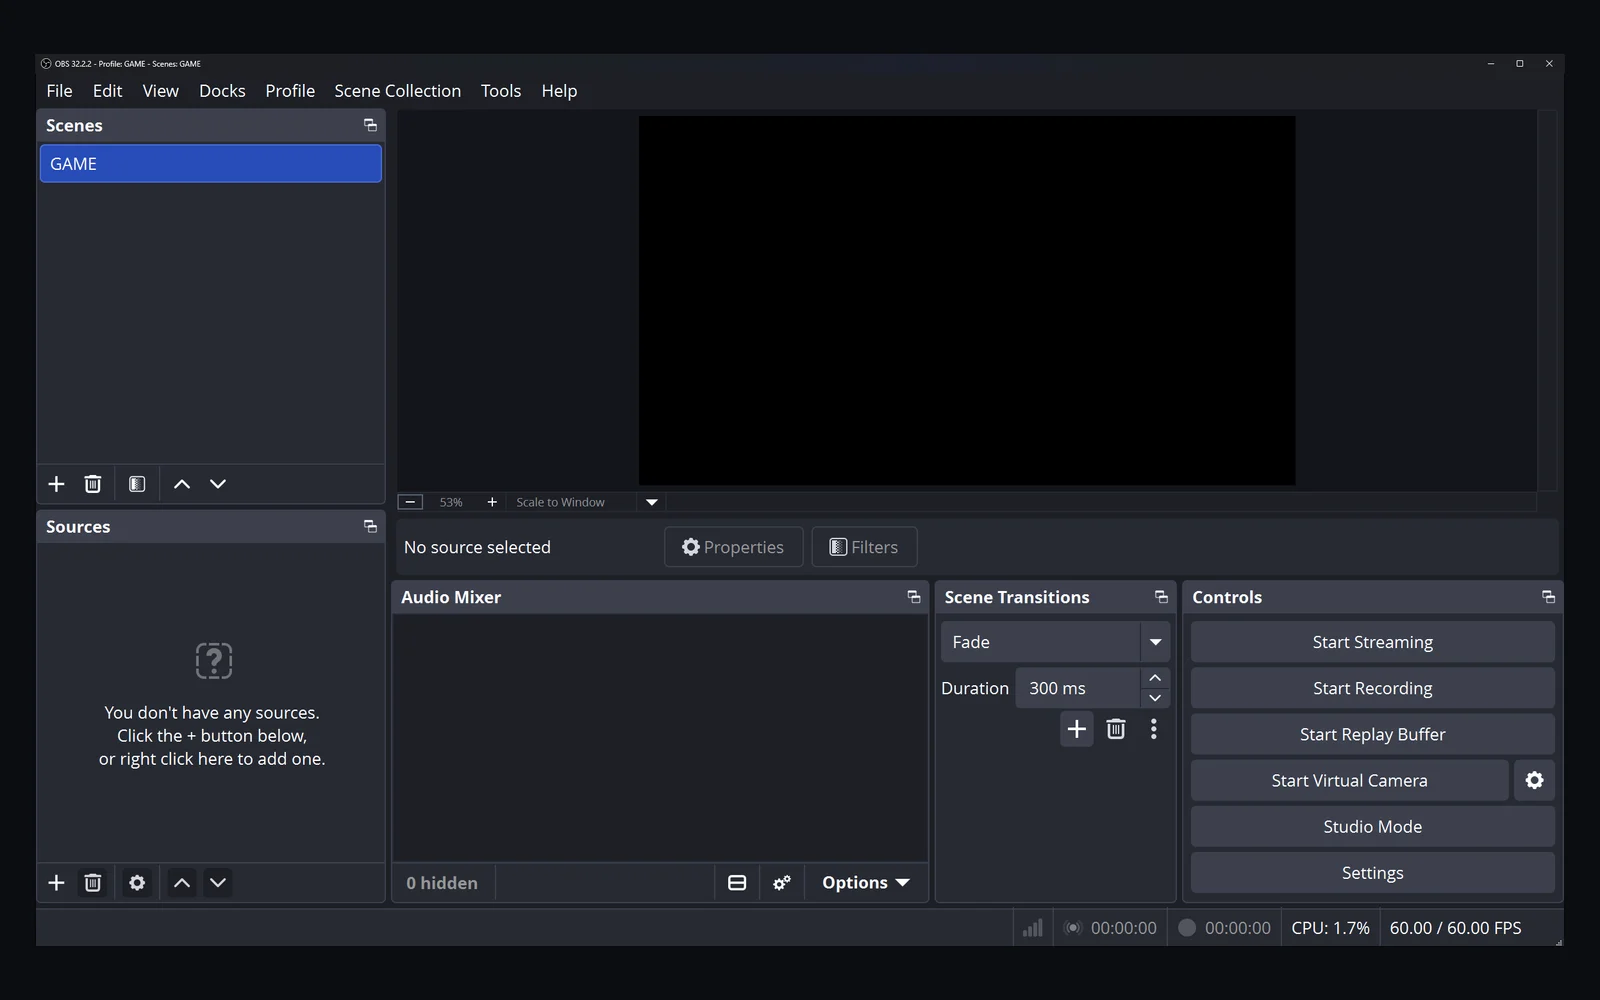
Do not confuse an enabled setting with a running buffer. Likewise, a save shortcut is not a command to start remembering footage retroactively. Nothing in this workflow can recover an earlier moment that was never captured.
Choose length and quality by testing
A useful replay includes enough context to explain the outcome without creating unnecessary trimming work. Start with the type of event you want to save:
| Your usual moment | What the replay needs to contain |
|---|---|
| A quick elimination | The setup, the action, and a short reaction |
| A multi-stage clutch | The decision-making before the final play |
| A funny exchange | The line that makes the response understandable |
Increase the duration only when your test clips repeatedly miss the beginning. A longer window also increases buffering needs. Do not assume one memory limit or encoder preset works on every PC; OBS recording options depend on the selected encoder and output configuration.4
Keep the configuration simple for the first successful save. If the game or recording stutters, test a less demanding recording setup and consult OBS's performance guidance rather than changing several controls at once.5
Run a test that proves the whole chain
Start the buffer, play a short practice sequence, speak a recognizable sentence, then save once. Open the newest file from the recording folder. Check the beginning and ending, the game image, your voice, and the game sound.
Repeat while the game is in the foreground. This second test catches a shortcut that only worked while you were looking at OBS. Restart OBS once and repeat your startup routine so you know what must be enabled next time.
If no file appears, use the Replay Buffer troubleshooting guide. If the picture is correct but the audio is missing, follow the replay audio checklist.
From a saved replay to a Short
A working replay is the capture stage, not a finished vertical edit. By hand, you would now choose the useful part, reframe it, add captions and check the result. In Clador Forge, the edit is made automatically, and checking it is optional.
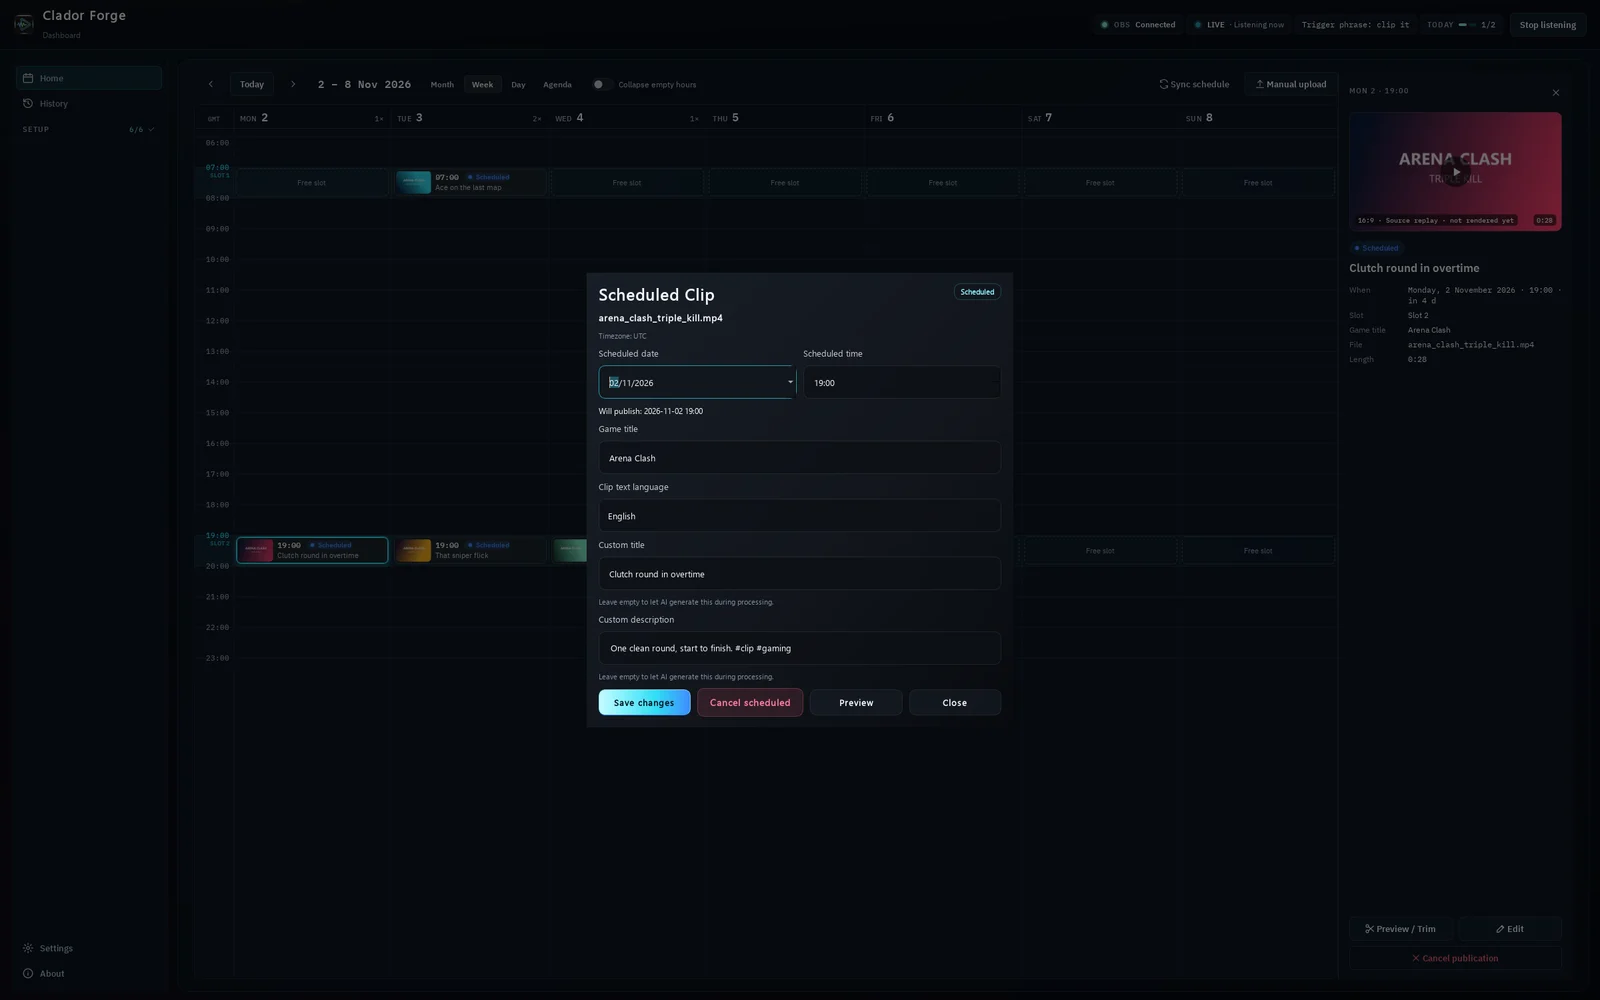
Clador Forge makes a vertical short from the saved moment. It places your gameplay and webcam, adds captions, and writes a title, a description and hashtags. The short appears as a card in the app's calendar, at the next free publishing time. If today's times are taken, it goes to the next free one. At the scheduled time, the short is published automatically: you do not need to press anything.3
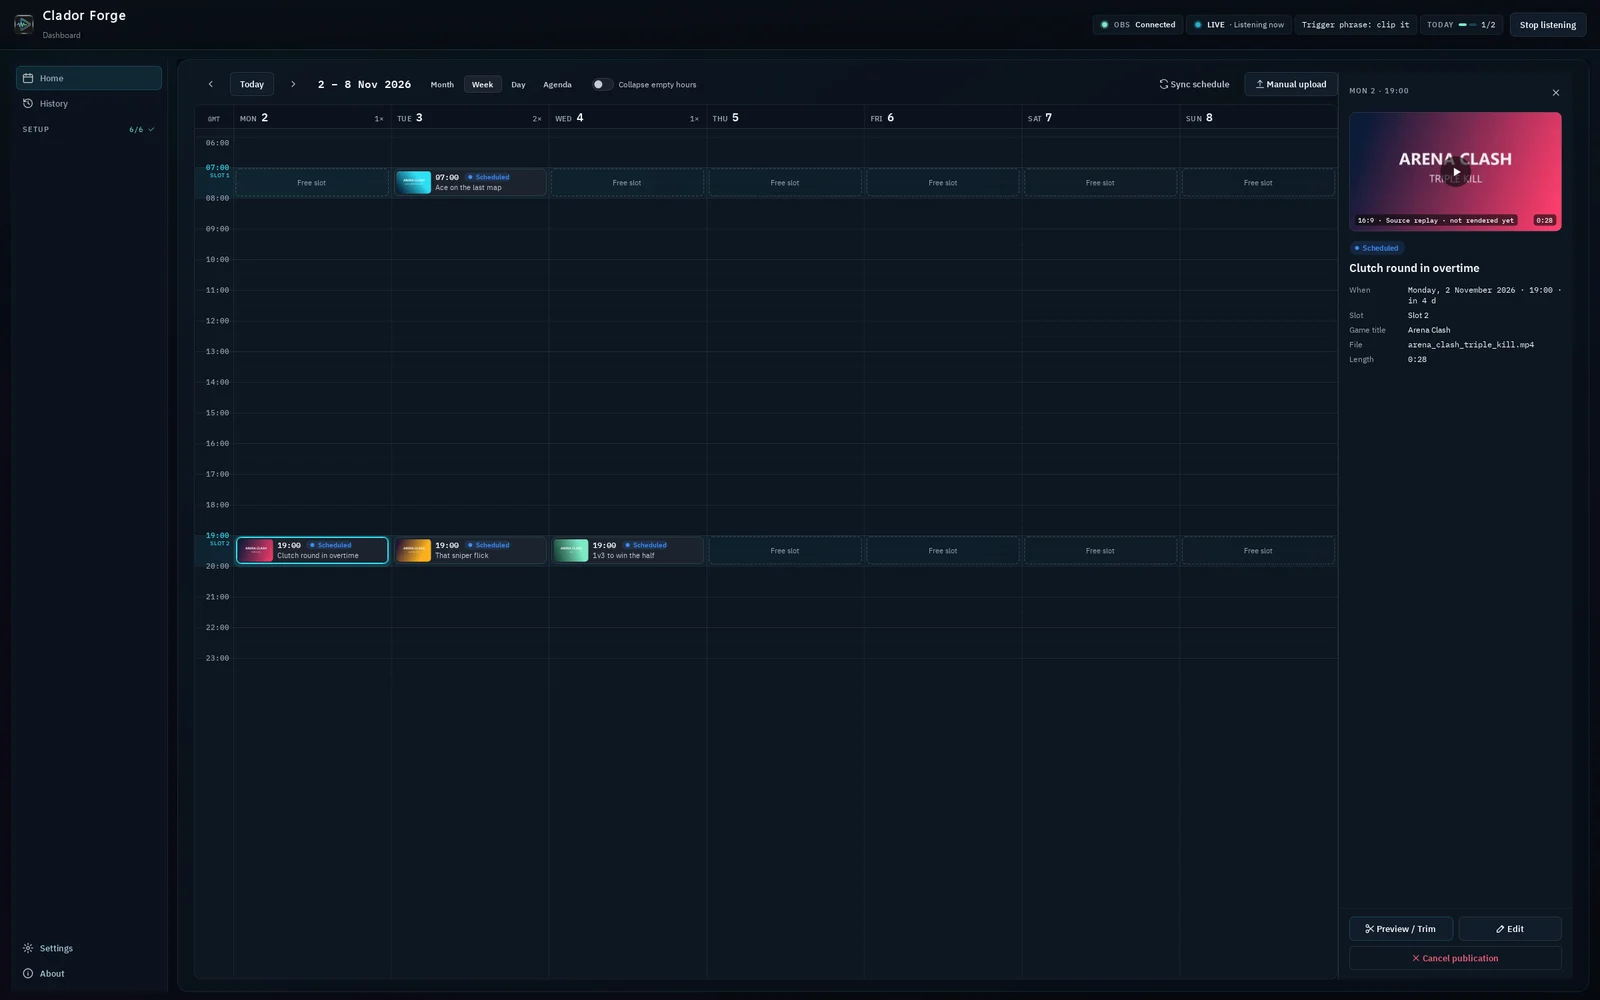
Click a clip in the calendar to see its details: from there you can watch and trim it, open the editor, or cancel the publication. In the editor you can change the date, time, title and description until 30 minutes before publishing. Leave the title or description empty, and Clador Forge writes them while it prepares the short.
Start with the Clador Forge setup guide once the native OBS test works. That way a capture problem never gets mixed up with clip processing.
Frequently asked questions
Must I be live to save gaming clips?
No. OBS supports local recording workflows as well as broadcasting. For this setup, what matters is that the correct scene is being captured and Replay Buffer is running.4
Is a replay always exactly the configured length?
Treat the setting as the intended recent-history window, not a guarantee that footage existed before the buffer started. Check a real saved file, especially just after startup or after changing settings.
Should I use the same key for start and save?
Use separate actions during setup. Once the routine works, keep the save shortcut easy to reach and unlikely to conflict with the game. The one-hotkey guide explains that part in detail.